1. Course overview
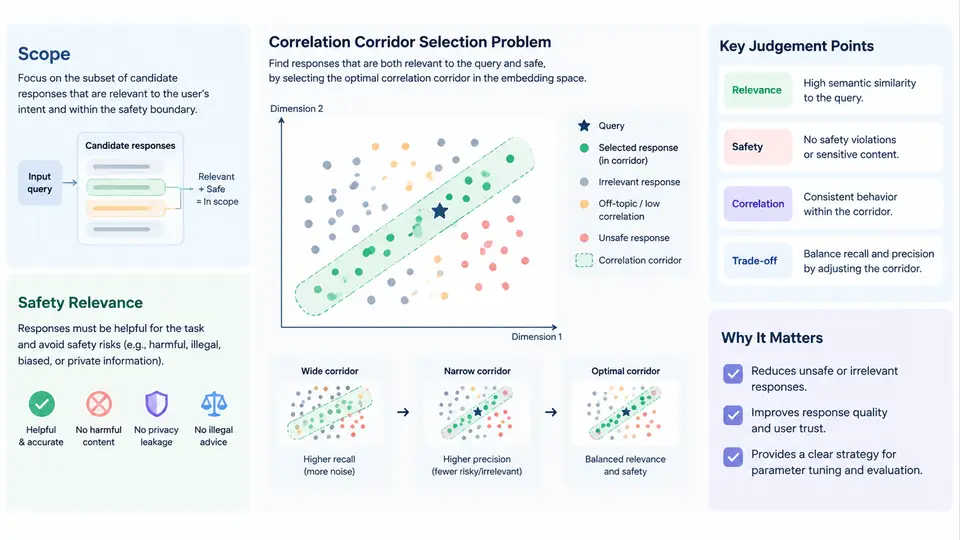
Safety-relevant response systems rarely act on a single measurement. A protective trip in a substation, an automatic emergency braking decision in a vehicle, or a shutdown command in a process plant is typically triggered only after several independent signals agree that a hazardous condition exists. The engineering discipline that governs how those signals are grouped, compared, and trusted is what this course calls correlation corridor selection: choosing, for each safety function, the set of sensing channels and the agreement logic that together form a defensible path from physical evidence to protective action.
The scope of the course spans the full selection lifecycle. It begins with the definition of the safety function and its required risk reduction, moves through channel architecture and voting arrangement, and ends with the evidence needed to demonstrate that the chosen corridor remains valid under fault, drift, and demand. The term corridor is deliberate. A corridor is not a single trip path but a bounded region of signal space — a set of channels, thresholds, and time windows — inside which the system is permitted to declare a hazard. Selection means deciding the boundaries of that region before the hazard occurs, not after.
Why correlation, and why corridors
Modern response systems are dense with sensors, and most of them are correlated to some degree. Temperature rises with load; vibration rises with speed; pressure falls when a seal fails. Some of that correlation is physical and trustworthy, and some is an artifact of shared power supplies, shared mounting, or shared software. A correlation corridor exploits the trustworthy part while remaining insensitive to the rest. The design question is therefore never "is there a correlation?" but "is this correlation strong enough, specific enough, and independent enough to justify a safety action?"
Consider a representative example used throughout this course. A compressor protection function must trip when bearing degradation produces both elevated vibration and a sustained rise in bearing temperature. Two channels are available: a vibration probe with a trip threshold of 7.1 mm/s RMS and a temperature element with a threshold of 95 °C. A naive design trips when either channel exceeds its threshold. That design has high availability of protection but poor specificity: a loose probe cable can produce a vibration spike, and a blocked cooling duct can raise temperature, each causing a spurious trip. A correlation corridor instead requires both conditions within a defined window — for instance, vibration above 7.1 mm/s RMS and temperature above 95 °C, sustained for 3 seconds, with the two channels confirmed independent. The corridor is the conjunction of threshold, persistence, and independence conditions.
The selection problem in engineering terms
Formally, corridor selection is a constrained optimization. The objective is to maximize the probability of detecting the hazardous condition (demand coverage) while keeping the spurious trip rate below an operationally acceptable limit, subject to architectural constraints such as sensor independence and diagnostic coverage. These objectives pull in opposite directions. Widening the corridor — lowering thresholds, lengthening windows, admitting more channels — raises coverage but also raises nuisance trips. Narrowing it does the reverse. The selection problem is to find the boundary where both constraints are satisfied with margin.
This is where most real projects fail, and it is worth being precise about the failure modes. The first is correlation by coincidence: two channels appear to agree because they share a common cause, such as a single 24 V supply feeding both transmitters. The corridor then has an independence assumption that is false, and a single fault defeats both channels simultaneously. The second is correlation by lag: the physical relationship is real but the time constants differ, so a coincidence window tuned to one operating point misses the hazard at another. The third is correlation by drift: channels agree at commissioning and diverge slowly, so the corridor silently loses coverage without any alarm.
What the corridor diagram makes visible
The figure above plots the two channels against each other. The dashed lines are the individual trip thresholds; the hatched rectangle is the selected corridor, where both channels exceed their thresholds within the persistence window. The two pale regions outside the corridor are the single-channel trip zones — the places where a naive OR-logic design would act. They are drawn deliberately as large areas, because in practice they dominate the spurious trip rate. The three annotated failure modes sit at specific locations: common cause at the corridor itself, temporal lag at the boundary where one channel arrives late, and drift in the region where the channels have separated without either crossing a threshold.
Reading the diagram operationally: a valid corridor must contain the hazardous operating points, exclude the known nuisance sources, and remain robust to the three annotated failure modes. That is the selection criterion in one sentence, and the rest of the course builds the methods to satisfy it.
Safety relevance and the regulatory frame
Corridor selection is not a tuning exercise; it is a safety argument. In functional-safety terms, the corridor is part of the specified safety function, and its parameters must be traceable to a hazard analysis and a risk assessment. The relevant standards — IEC 61508 and its sector derivatives such as IEC 61511 for process industry and ISO 26262 for automotive — require that the selected architecture achieve a target failure measure, and that systematic faults in the selection logic be controlled by design review and verification. A corridor chosen by field tuning without documented rationale will not survive an assessment, even if it works.
Two consequences follow. First, every corridor parameter needs a recorded justification: why this threshold, why this window, why these channels and not others. Second, the corridor needs a defined proof-test interval and a diagnostic strategy, because the drift failure mode is invisible without periodic verification. The course treats both as first-class deliverables rather than afterthoughts.
How the course is organized
The remaining chapters build the selection method in layers. Early chapters establish the hazard basis and the channel architecture, including independence and common-cause analysis. The middle chapters develop the quantitative tools: coverage estimation, spurious trip rate calculation, coincidence-window sizing against physical time constants, and drift detection through comparison diagnostics. Later chapters address implementation — logic configuration, proof-test design, and the documentation package that supports assessment — and close with case studies in process, power, and transport systems. Each chapter is self-contained but assumes the vocabulary introduced here.
The single idea to carry forward is this: correlation corridor selection is the disciplined choice of which signals may jointly authorize a safety action, bounded in space, amplitude, and time, and justified by evidence that survives fault, drift, and demand. Everything that follows is method for making that choice defensible.